HTML5 <canvas> Tag
Introduction to HTML5 <canvas> Tag
अब तक web pages में graphics और animations create करने का कोई mechanism नहीं था। इसके लिए flash और silverlight जैसे technologies use की जाती रही है। लेकिन अब HTML5 की वजह से web developers graphics और animations directly webpages में create करने में सक्षम है।
अब webpages में animations show करने के लिए आपको किसी प्रकार की flash file को webpage में add करने की आवश्यकता नहीं है। इसके अलावा आपको animation show करने के लिए किसी प्रकार के extensions जैसे की flash player आदि की भी आवश्यकता नहीं है।
HTML5 का <canvas> tag web page में graphics design करने के लिए use किया जाता है। <canvas> element सिर्फ graphics के लिए एक container का काम करता है। इसमें graphics draw करने के लिए आप scripting language use करते है। ज्यादातर इसके साथ javascript use की जाती है।
Canvas अपने आप में एक अलग technology है। इसके साथ आपको अलग अलग graphics draw करने के लिए अलग अलग methods available है। इन methods को canvas के context के द्वारा access किया जाता है।
Canvas technology के कुछ features निचे दिए जा रहे है।
- Animation - <canvas> पर draw किये गए हर object को animate किया जा सकता है। <canvas> पर आप bouncing ball जैसे simple animations से लेकर complex animations तक create कर सकते है।
- Interactive - <canvas> सभी HTML event attributes को support करता है। <canvas> user के द्वारा generated हर event पर respond कर सकता है। उदाहरण के लिए user के mouse click करने पर या key press करने आदि पर <canvas> respond कर सकता है।
- Flexible - <canvas> पर आप text और अलग अलग shapes जैसे की circle, rectangle, lines आदि draw कर सकते है। इसके अलावा आप canvas में audio और video भी add कर सकते है।
- Reusable - एक बार create करने के बाद आप <canvas> को कँही भी display कर सकते है। क्योंकि सभी browsers इसे support करते है। ऐसा flash या silverlight technology के साथ possible नहीं है।
- Standard - Canvas technology आप निश्चिन्त होकर use कर सकते है क्योंकि यह एक standard है। ऐसा नहीं है की future में ये technolgy replace कर दी जायेगी।
- Platform - सभी browsers के अलावा canvas technology को सभी तरह के devices जैसे की desktop mobile आदि पर use किया जा सकता है।
Canvas technology की कुछ common applications निचे दी जा रही है।
- Gaming - Canvas technology हर level का animation create करने की ability user को provide करती है। इसे gaming applications develop करने के लिए use किया जा रहा है।
- Advertising - Advertising के लिए use होने वाली flash technology को canvas के द्वारा replace किया जा सकता है।
- Education & Training - क्योंकि canvas technology graphical possibilities provide करती है। इसलिए इसे training और education provide करने के लिए भी use किया जा सकता है।
Syntax of HTML5 <canvas> Tag
निचे <canvas> tag का general syntax दिया जा रहा है।
<canvas id="canvas-id" width="int-number" height="int-number">
You can write a message here that will be shown when browser does not support canvas element. This message can be put inside paragraph or span element.
</canvas>
जैसा की आप ऊपर दिए गए syntax में देख सकते है canvas tag में id, width और height attributes define किये गए है। जब आप कोई <canvas> element को specify करते है तो इन attributes को define करना अनिवार्य होता है। इन attributes में id attribute javascript के द्वारा <canvas> का context प्राप्त करने के लिए use किया जाता है और width और height attributes canvas की लम्बाई और चौड़ाई define करते है। <canvas> tag को </canvas> ending tag से close किया जाता है।
जब तक आप <canvas> की border specify नहीं करते है तो <canvas> properly show नहीं होता है। <canvas> की border आप style attribute द्वारा इस प्रकार define कर सकते है।
<canvas id="canvas-Id" width="int-number" height="int-number" style="border:1px solid #000000">
Message for when browser does not support canvas element
</canvas>
JavaScript द्वारा <canvas> का context प्राप्त करने का general syntax निचे दिया जा रहा है।
var canv = document.getElementById("canvas-id");
var cntxt = canv.getContext("2d");
जैसा की आप ऊपर दिए गए syntax में देख सकते है सबसे पहले canvas को DOM द्वारा एक object के रूप में access किया जाता है। इसके बाद उस object पर getContext method call करके canvas का context प्राप्त किया जाता है। इस method में आप 2d pass करते है। इससे ये पता चलता है की graphics 2d shape में होगा।
जब भी आप कोई graphic draw करे तो आपको एक बात हमेशा याद रखनी चाहिए की canvas में codinates का origin हमेशा top left corner में (0,0) position से शुरू होता है। जब आप कुछ draw करते है तो x coordinate (horizontal) right side में और y coordinate (vertical) bottom की तरफ increase किया जाता है।
उदाहरण के लिए यदि आप left से 100 और top से 80 coordinate पर कोई line draw करना चाहते है तो उसे इस प्रकार लिखेंगे।
lineTo(100,80);
इसी प्रकार आप दूसरे graphics भी इन coordinates के आधार पर draw कर सकते है।
Attributes of HTML5 <canvas> Tag
<canvas> tag सभी HTML global attributes (class, id आदि) और events attributes (onmouseover, onclick आदि) को support करता है।
Example of HTML5 <canvas> Tag
निचे <canvas> element द्वारा एक rectangle draw करने का उदाहरण दिया जा रहा है।
<html>
<body>

<canvas id="myCanvas" width="400" height="400" style="border:1px solid #eeeeee;">
Your browser does not support HTML5 canvas element. Please switch to a browser that supports canvas element.
</canvas>

<script>
var can = document.getElementById("myCanvas");
var cntxt = can.getContext("2d");
cntxt.fillStyle = 'lime';
cntxt.fillRect(100,100,200,200);
</script>

</body>
</html>
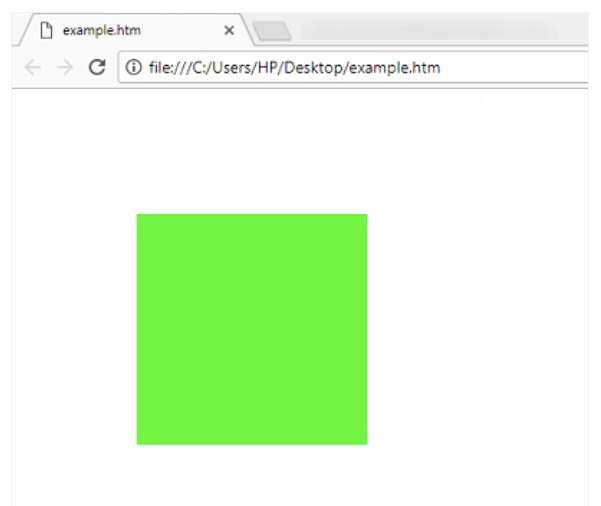
ऊपर दिया गया उदाहरण निचे दिया गया output generate करता है।