Styling Images with CSS
Introduction to CSS Image Properties
CSS आपको कुछ properties provide करती है जिनकी मदद से आप images को optimize कर सकते है। ये properties images की height, width, border और opacity आदि define करती है। इनकी list निचे दी जा रही है।
- image border
- image height
- image width
- image opacity
- image radius
आइये इन सभी properties के बारे में detail से जानने का प्रयास करते है।
Image border Property
Border property के द्वारा आप किसी भी image की border की चौड़ाई, उसका type (dotted, dashed आदि) और उसका color define कर सकते है। इन attributes को define करके आप किसी भी image को अपने webpage के लिए optimize कर सकते है।
Border property define करने का syntax नीचे दिया जा रहा है।
border : width | type | color;
Border की चौड़ाई आप pixels में देते है। जैसे की:
border:2px;
- Border की चौड़ाई के बाद border का type define किया जाता हैं। CSS में borders के 4 basic types होते है।
- dotted - Border dotes की form में represent होती है।
- dashed - Border dashes की form में represent होती है।
- double - Border double lines के रूप में show होती हैं।
- solid - Border एक solid line के रूप में show होती है।
- Border का type define करने के बाद आप उसका color define करते है। Color का आप नाम भी दे सकते है और इसे hex code के रूप में भी define कर सकते है।
Images की border से related CSS आपको border-radius property भी provide करती है जिसकी मदद से आप चाहे तो images को round बना सकते है। इस property की value आप % में define करते है। यदि आप images को पूरी तरह round बनाना चाहते है तो आपको value 50% देनी होगी। जैसे की:
border-radius:50%;
Border property का उदाहरण निचे दिया जा रहा है।
<html>
<head>
<title>Image border property demo</title>
<style>
img
{
   border:2px solid ;
   border-radius:20%;
}
</style>
</head>
<body>
<h1> Image border & radius Example</h1>
<img src="image.png">
</body>
</html>
ऊपर दिया गया code निचे दिया गया output generate करता है।

Image height Property
Height property के द्वारा आप image की height define करते है। Image की height आप pixels में भी define कर सकते है और % में भी define कर सकते है। जब आप % में height define करते है तो image container के according उतनी % height ले लेती है। जैसे की यदि 50% height define करते है तो image window की 50% height ले लेगी।
Image height property का उदाहरण नीचे दिया जा रहा है।
<html>
<head>
<title>Image height property demo</title>
<style>
img
{
   height:200px;
   // in percentage - height:50%;
}
</style>
</head>
<body>
<h1>Image height Example</h1>
<img src="image.png">
</body>
</html>
ऊपर दिया गया code निचे दिया गया output generate करता है।
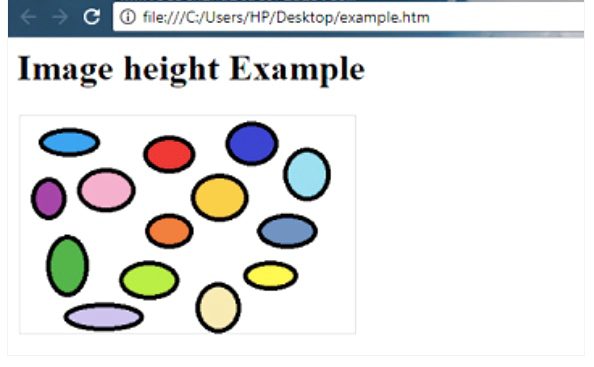
Image width Property
Width property के द्वारा आप images की width define करते है। Width आप pixels में भी define कर सकते है और % में भी define कर सकते है। जैसा की मैने ऊपर बताया जब आप % में width define करते है तो image container की उतनी % width में show होती है।
Image width property का उदाहरण निचे दिया जा रहा है।
<html>
<head>
<title>Image width property demo</title>
<style>
img
{
   height:200px;
   width:300px;
   //In percentage - width:30%;
}
</style>
</head>
<body>
<h1>Image width Example</h1>
<img src="image.png">
</body>
</html>
ऊपर दिया गया code निचे दिया गया output generate करता है।
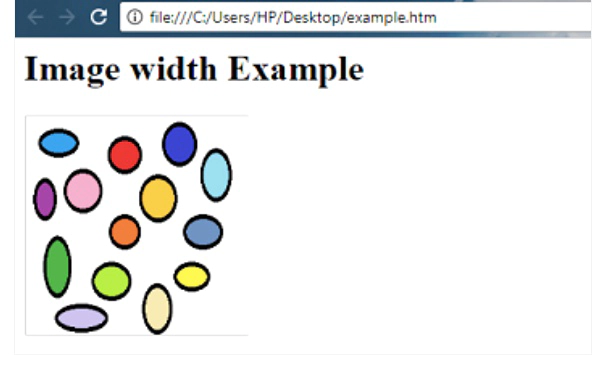
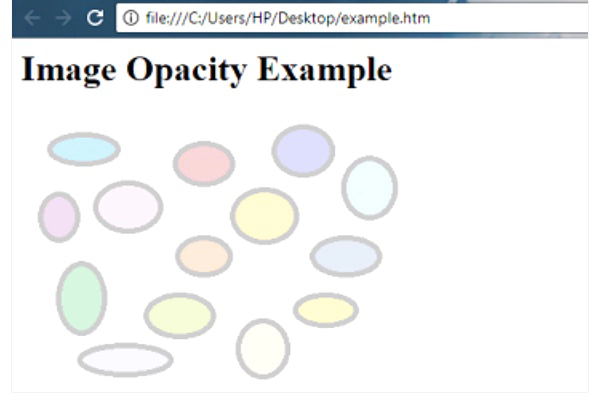
Image opacity Property
Opacity property के द्वारा आप images की sharpness और clarity define कर सकते है। इस property की value 0.1 से लेकर 1 तक हो सकती है। जैसे जैसे आप value को बढ़ाते जाते है तो images उतनी है clear visible होती जाती है। 0.1 value में images सबसे धुँधली और 1 value से images सबसे clear show होती है। Opacity property का उदाहरण निचे दिया जा रहा है।
<html>
<head>
<title>image opacity property</title>
<style>
img
{
   opacity:0.2;
}
</style>
</head>
<body>
<h1>Image Opacity Example</h1>
<img src="image.jpg">
</body>
</html>
ऊपर दिया गया code निचे दिया गया output generate करता है।